


©Copyright Shenzhen Hehejin Industrial Co., LTD. All rights reserved. Site Map
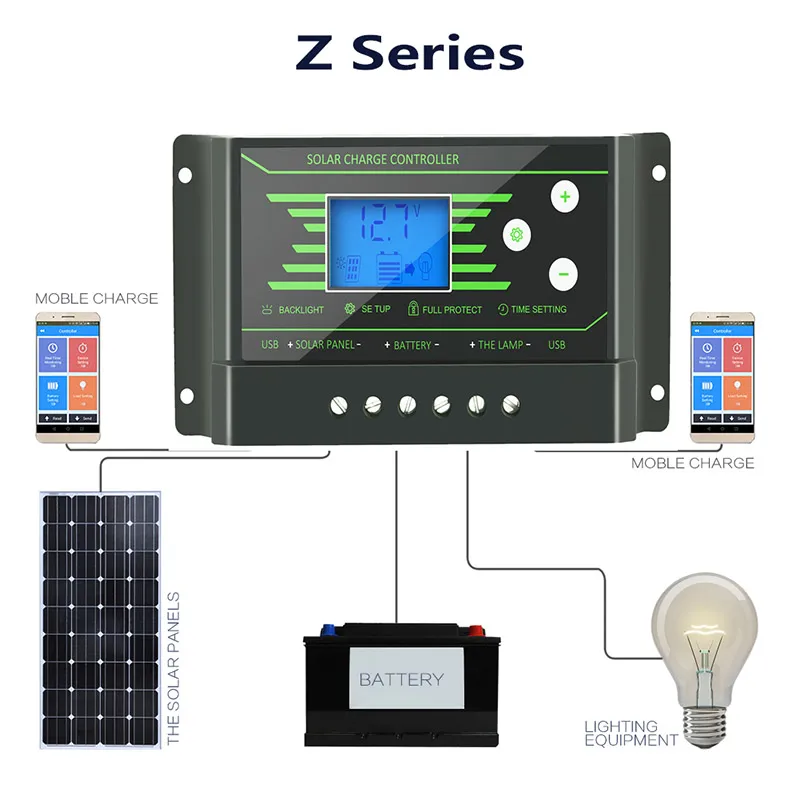

The controller is for off-grid tie system and control the charging and discharging of the battery.main function is protecting battery and improve.This parameter is High Voltage Disconnect(HVD) voltage.(Boost state voltage will be increase 0.6V base on HVD).the controller will be started PWM function at this point(HVD),limited voltage rising.
|
Current:
|
|
|
Model:
|
|


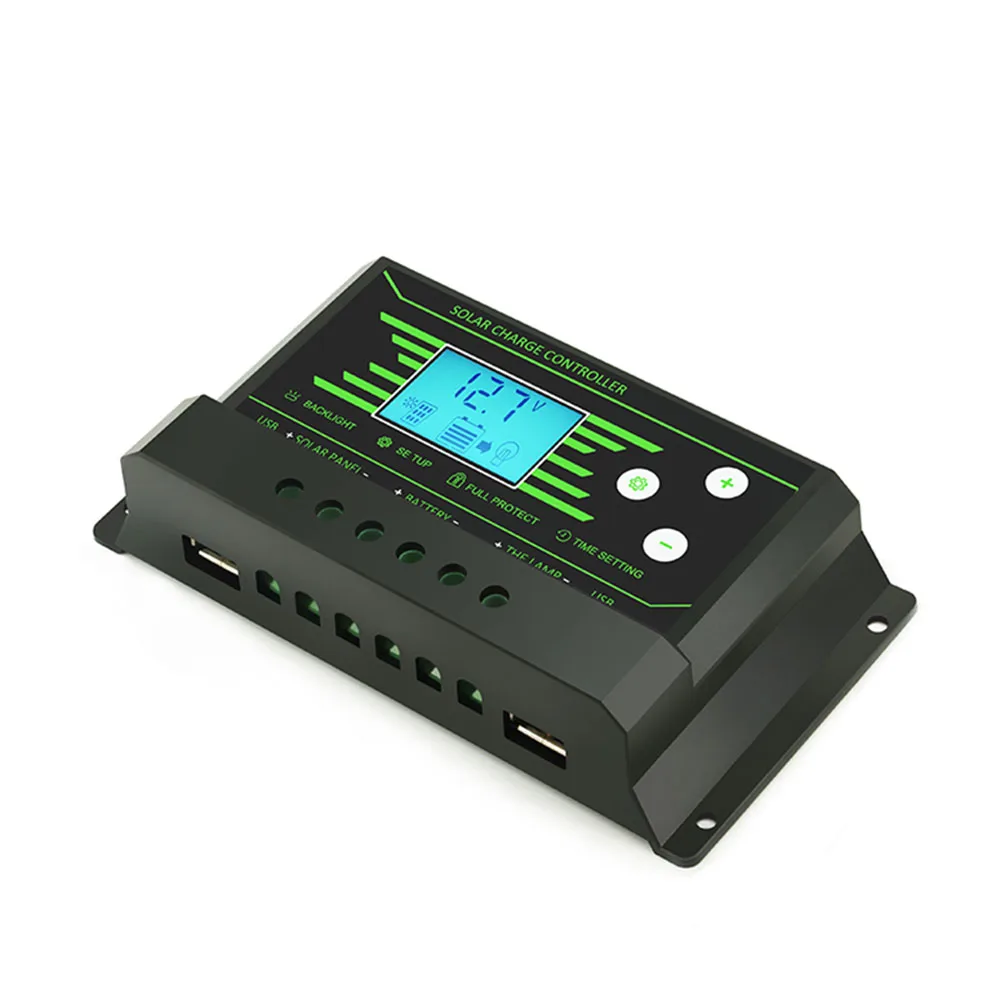
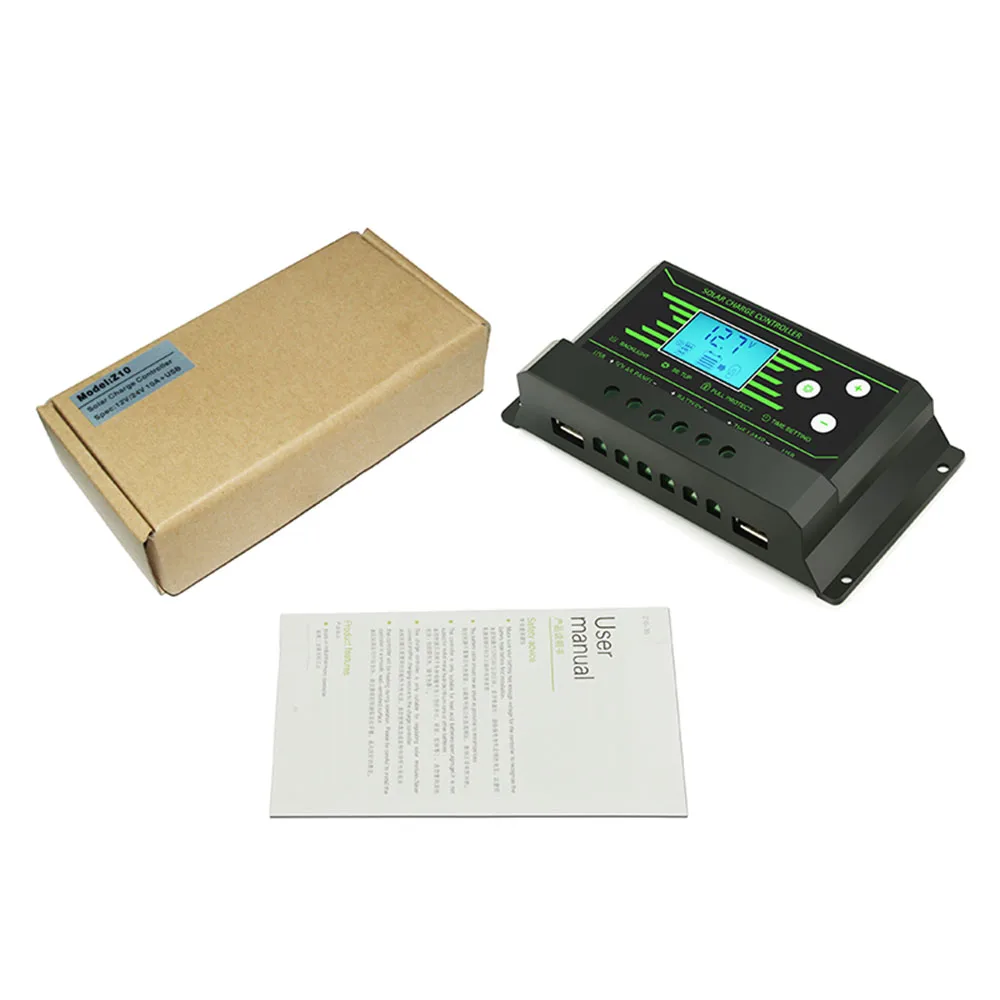
PowMr 12V/24V 10A 20A Light and Timer control PWM Solar Charge Controller
Features
Brand:PowMr
Product Model: Z10
build-in industrial micro chip so that can guarantee work well.
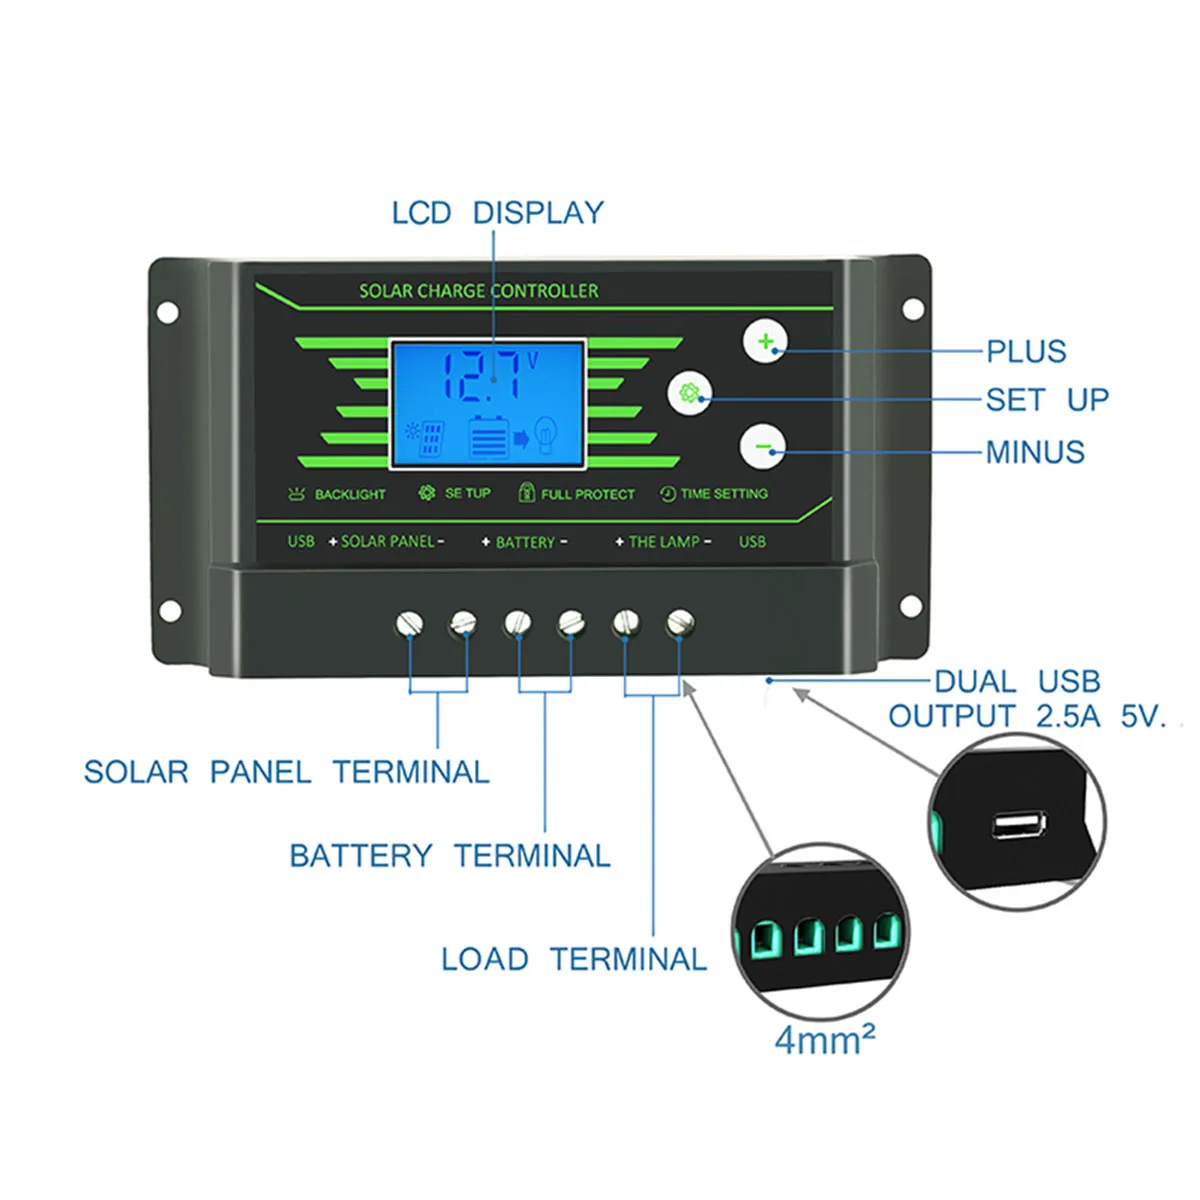
Humanized LCD displaying backlight and three buttons operation of man-machine interface.
High efficiency intelligent PWM Fully 3-stage charging mode.
Light and 24h Timer load control modes can be selected,timer function can be reset for street light at night.
Dual USB output, the maximum current of 2.5A, support mobile phone charging.
Accept OEM,ODM service,can print the logo,brand on the sticker and shell,can change the sticker color and appearance.
Over-load protection.
Build-in short-circuit protection
Open-circuit protection.
Reverse current protection.
Low heat production.
Overview
Read all of the instructions and cautions in the manual before beginning the installation.
1.Brand: PowMr
2.Product Model: Z10
3. There are no serviceable parts for this controller. Do NOT disassemble or attempt to repair the
controller.
4.Make sure all connections going into and from the controller are tight.
5.Do NOT allow water to enter the controller,please install in the room.if installed outside,please
keep the environment dry,avoid directly sunlight.
6.NEVER connect the solar panel array to the controller without a battery. Battery must be
connected first.
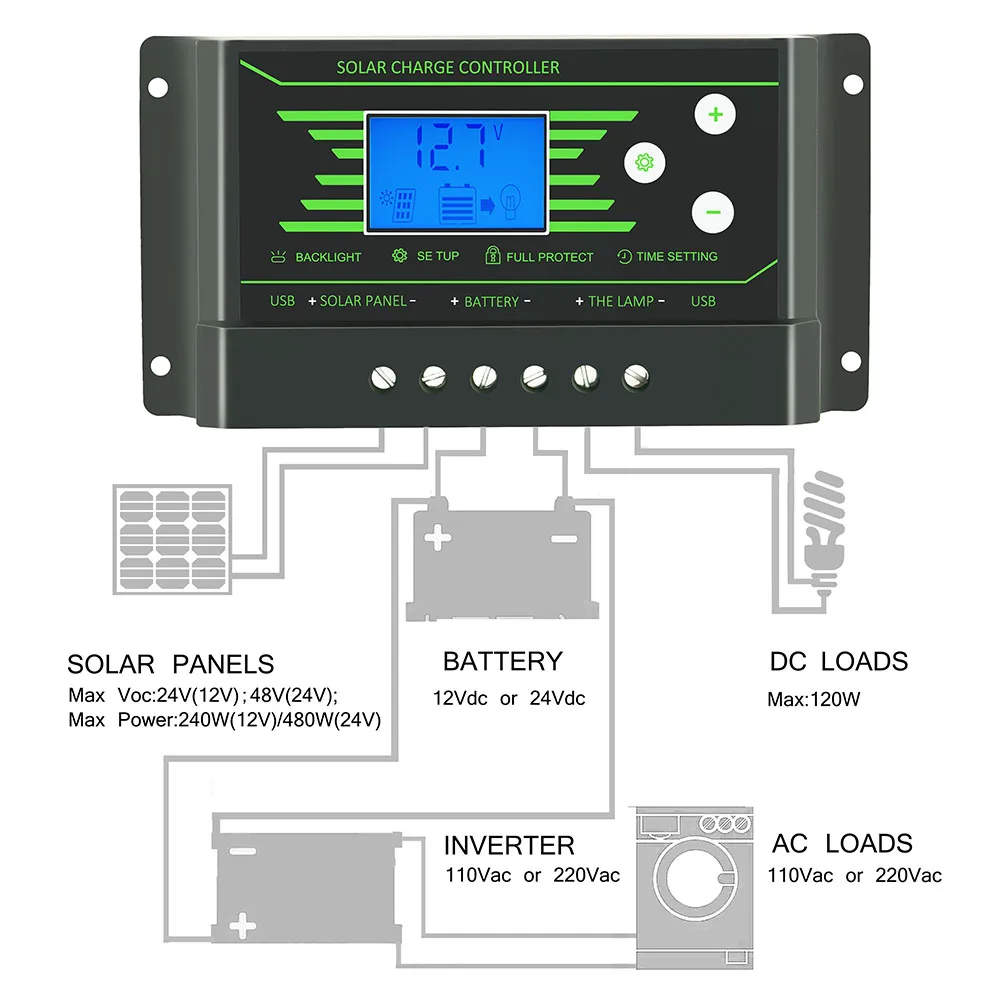
7.DO NOT connect any inverter or battery charger into the load terminal of the charge controller.
8.Refer to the technical specification for the maximum current value and maximum wire size
passing over the controller. Make sure your total input voltage and power does not exceed.
9.This controller only suitable for Solar Photovoltaic panel, Never connect other power source to
this controller.
10.Make sure your battery has enough voltage for controller to recognize your battery voltage
before first installation.
11.Never install the controller in a sealed location with batteries, Do not install in an area where
battery or any other flammable gasses can accumulate.
12.This Controller only suitable with the following battery types, Never connect any other type
battery.
a. Lead Acid Batteries
b. GEL Batteries


Installation Instructions
Tools required for installation: Screwdriver, Meter

1. Choose the installation location - Install the charge controller vertically in a place where it will not be exposed to direct sunlight and not high temperature and do not install in location where water can enter the controller.
2. Please confirm environment that sufficient ventilation is possible.
2. Clearance check - At least 6 inches (150 mm) clearance must be left above and below the controller in order to wire.
3. Cut the wall - The width of the part to cut the wall is slightly larger than the inside width of the controller and the depth must be 1.7 inches (43 mm) or more.
4. please select correct screw to fix the controller on the wall or other platform.
5. Please reserve enough space between the wall and controller,to allow for cooling and cable connection.
Model | Z10 | Z20 | Z30 |
Battery voltage | 12V/24V auto | ||
Charging current | 10A | 20A | 30A |
Discharge current | 10A | 20A | 30A |
Max solar input | 12V battery, the highest 23V: 24V battery when the highest 46V | ||
Equalization | 14.4V | ||
Float charge | 13.7V (default, adjustable) | ||
Discharge stop | 10.7V (default, adjustable) | ||
Discharge reconnect | 12.6V (default, adjustable) | ||
Charge reconnect | 13V | ||
Voltage of open light | Solar panel 8V (Light lights delay) | ||
USB output | Dual USB output,5V/2.5A(MAX) | ||
Self-consume | <10mA | ||
Operating temperature | -35~ +60℃ | ||
Size/Weight | 5.91*3*1.5 in/0.37 lb | ||
